Friends, Danish Junket makes the world go 'round.
And it sure makes this dessert incredibly delicious!
This one is actually my great-aunt Jean's recipe, but Gram made a big (read: incredible!!) change to it...the original recipe called for a chocolate pudding layer, which Gram substituted with Danish Junket and raspberries.

Yum diggity.
What is "Danish Junket" you ask? Well, to my non-culinary trained eye, it appears as though it is some sort of raspberry flavored gelatin. I'm not sure what makes it Danish. Or junket (isn't that a bird?), but whatever it is, I'll take it...'cuz it is so yummy!
Okay, let's start with the crust.
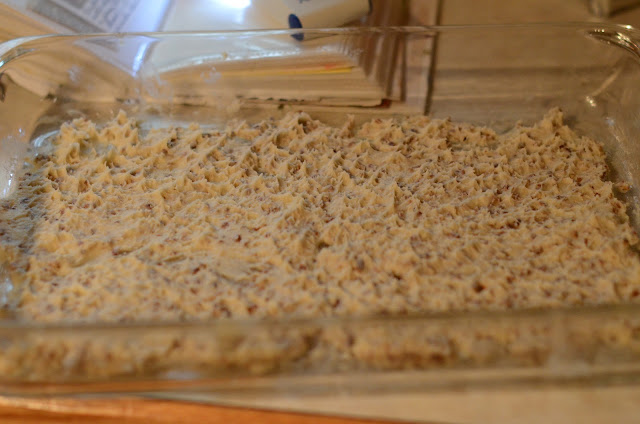
Butter, flour and chopped pecans:

Spread into a greased 9x13 pan and bake (it's not easy to spread, Gram says using your hands works best!):
As the crust bakes, cook your 3rd layer, which is the Danish Junket, cooked according to the package directions:


While the crust is cooling, mix up the 2nd layer, which is cream cheese, powdered sugar and Cool Whip:

When the crust and the junket are cool, assemble. The cream cheese mixture goes on top of the crust...be careful, the crust is not a solid, stable crust. It works best to plop the mixture into small mounds, then carefully spread it out from there!

Carefully being the key word.

Next up, raspberries:

Then, the junket over the top.

Now, you could do one of two things, cool the junket so it sets up completely before spreading with Cool Whip (the 4th layer) OR, do like we did and just dive in with the final layer of Cool Whip.

Which lead to some pink swirls on the Cool Whip...but hey! Pink swirls are all the rage now, so go for it! Wait. What? When did pink swirls become all the rage?
Now I'm confused. ;)
Chill for several hours, or overnight, cut into squares and enjoy!
Gram's 4 Layer Dessert
Printable Recipe

Crust:
1 stick softened butter
1/2 cup flour
1/2 cup chopped pecans (optional)
Preheat oven to 375*F. Combine all, spread into greased 9x13 pan and bake for 15 min. Allow to cool completely.
2nd layer:
8 oz cream cheese, softened
1 c. powdered sugar
1 c. Cool Whip (save remainder of container for 4th layer)
Combine all, spread on cooled crust. Works best to "plop" little mounds of this layer onto crust and CAREFULLY spread out.
3rd layer:
2 packages Danish Junket cooked according to package. Cool.
2 c. fresh raspberries
Sprinkle raspberries on top of cream cheese layer, then poor cooled Danish Junket over raspberries.
4th layer:
Remaining Cool Whip
Spread Cool Whip over the top of the junket. For a "cleaner" (i.e. non-pink swirly) topping, allow junket to set up before spreading final Cool Whip layer on. If pink swirls are your kinda thing, then just immediately follow junket layer with Cool Whip layer.
Cover with plastic wrap and chill for several hours or overnight before spreading!
Enjoy!

And it sure makes this dessert incredibly delicious!
This one is actually my great-aunt Jean's recipe, but Gram made a big (read: incredible!!) change to it...the original recipe called for a chocolate pudding layer, which Gram substituted with Danish Junket and raspberries.

Yum diggity.
What is "Danish Junket" you ask? Well, to my non-culinary trained eye, it appears as though it is some sort of raspberry flavored gelatin. I'm not sure what makes it Danish. Or junket (isn't that a bird?), but whatever it is, I'll take it...'cuz it is so yummy!
Okay, let's start with the crust.
Butter, flour and chopped pecans:

Spread into a greased 9x13 pan and bake (it's not easy to spread, Gram says using your hands works best!):


Carefully being the key word.


Then, the junket over the top.

Now, you could do one of two things, cool the junket so it sets up completely before spreading with Cool Whip (the 4th layer) OR, do like we did and just dive in with the final layer of Cool Whip.

Now I'm confused. ;)
Chill for several hours, or overnight, cut into squares and enjoy!
Gram's 4 Layer Dessert
Printable Recipe

Crust:
1 stick softened butter
1/2 cup flour
1/2 cup chopped pecans (optional)
Preheat oven to 375*F. Combine all, spread into greased 9x13 pan and bake for 15 min. Allow to cool completely.
2nd layer:
8 oz cream cheese, softened
1 c. powdered sugar
1 c. Cool Whip (save remainder of container for 4th layer)
Combine all, spread on cooled crust. Works best to "plop" little mounds of this layer onto crust and CAREFULLY spread out.
3rd layer:
2 packages Danish Junket cooked according to package. Cool.
2 c. fresh raspberries
Sprinkle raspberries on top of cream cheese layer, then poor cooled Danish Junket over raspberries.
4th layer:
Remaining Cool Whip
Spread Cool Whip over the top of the junket. For a "cleaner" (i.e. non-pink swirly) topping, allow junket to set up before spreading final Cool Whip layer on. If pink swirls are your kinda thing, then just immediately follow junket layer with Cool Whip layer.
Cover with plastic wrap and chill for several hours or overnight before spreading!
Enjoy!
Do you think jello could replace the junket? I don't know if we have that in our stores. Looks like a really yummy summer treat!
ReplyDelete